
Simple and Secure Static Serving with AWS
Written by Rosemary Keenan. Should take about 9 minutes to read.
What is Serverless?
Serverless web services allow you to run small pieces of code without the need for an application server. In our case, we'll be talking about hosting your website on AWS using S3 for static content and Lambda for serverless code execution, but there are a number of different providers that offer different perks for you to choose from. Utilizing static web hosting makes development easier because it eliminates the server management part of web development, which minimizes dev time. It also means you don't have to worry about the physical part of making sure you have enough servers and enough secure places to store them. In some cases, you also get more assurance your website will stay up in the event of an outage or heavy traffic. For instance, AWS provides automatic scalability and backup insurance, so you don't have to worry about what would happen if you have too much traffic to your site or if your servers unexpectedly crash.
Our Example
In order to demonstrate that it is possible to host a secure static serverless site, I will be going through the architecture we used here at Shyft to create our beta weather viewing app. All the following architecture was created and is currently hosted on Amazon Web Services.
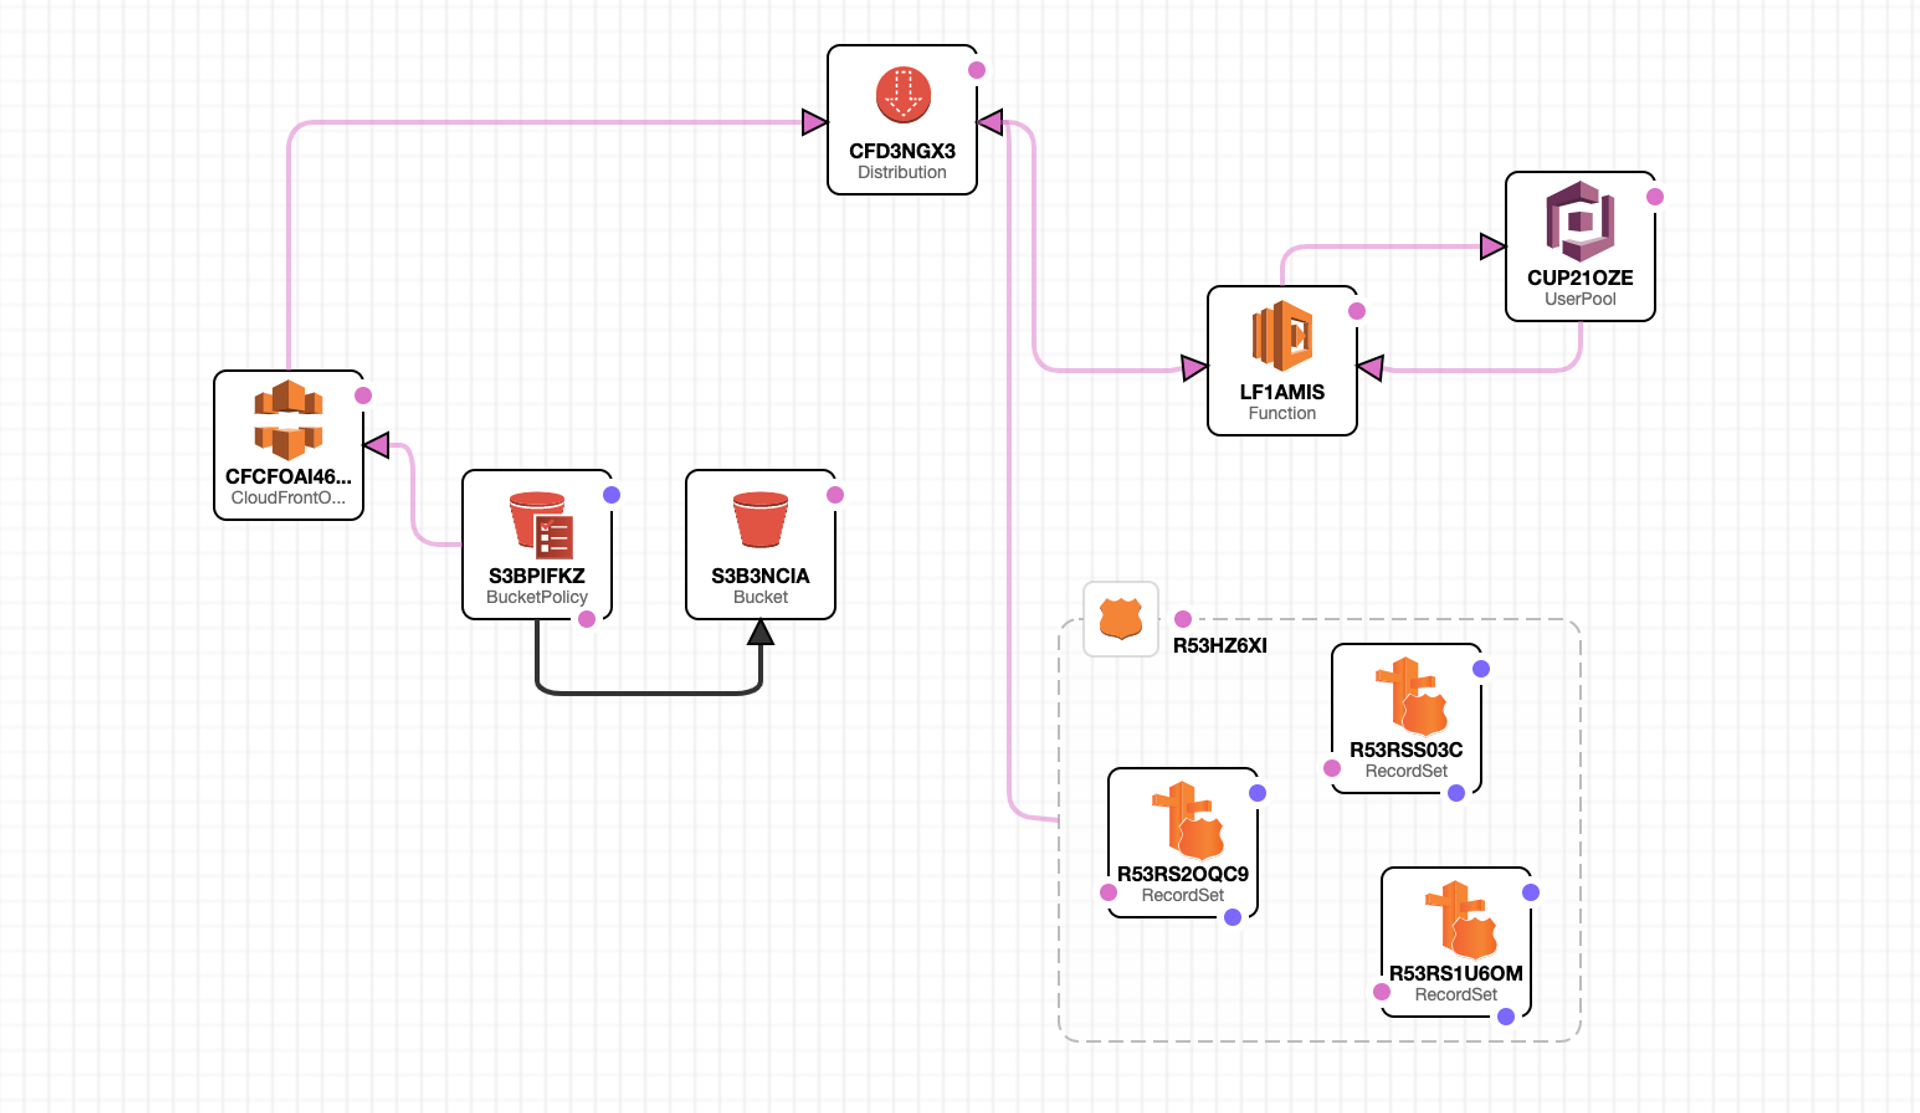
Above is a rough visualization of the architecture of our beta site. This visualization was actually created in an AWS product called AWS Cloudformation. Cloudformation allows you to create a template with the exact amount of resources you need and spin it up automatically, rather than spinning up each resource individually. The template I've created above is not exactly what our architecture would look like in the designer, but I felt this look would be easier to read and understand. For a quick overview: the static content of our site will be hosted in the S3 bucket, and the S3 bucket policy will determine who is allowed to view those contents. The S3 bucket will be access through the Cloudfront distribution origin access identity, which is connected only to the S3 bucket and the Cloudfront distribution itself. A user can get to the cloudfront distribution by following the urls we register in ACM and Route 53. Then, before a user can view the actual static contents of the site, they will be redirected by a Lambda function to the Cognito hosted sign in UI, which will ensure the user is authorized to log in. Sounds a little crazy I know, but I'll break it down for you piece by piece.
The S3 Bucket
AWS S3 is Amazon's online object storage platform, with "S3" standing for "Simple Storage Service". And simple it is! All the content in S3 is split into "buckets" where you can upload static content. Each bucket has its own autogenerated URL, and once something is uploaded to a bucket it is given its own url based on its relative place in the bucket. So for example; if you had a bucket and the bucket had a url like 123.com, then in the bucket you created a folder called "home" with a file inside it called "house.jpg", you'd be able to access that file by going to 123.com/home/house.jpg in your browser. Obviously the real autogenerated urls are much more complicated than that, but you get the idea.
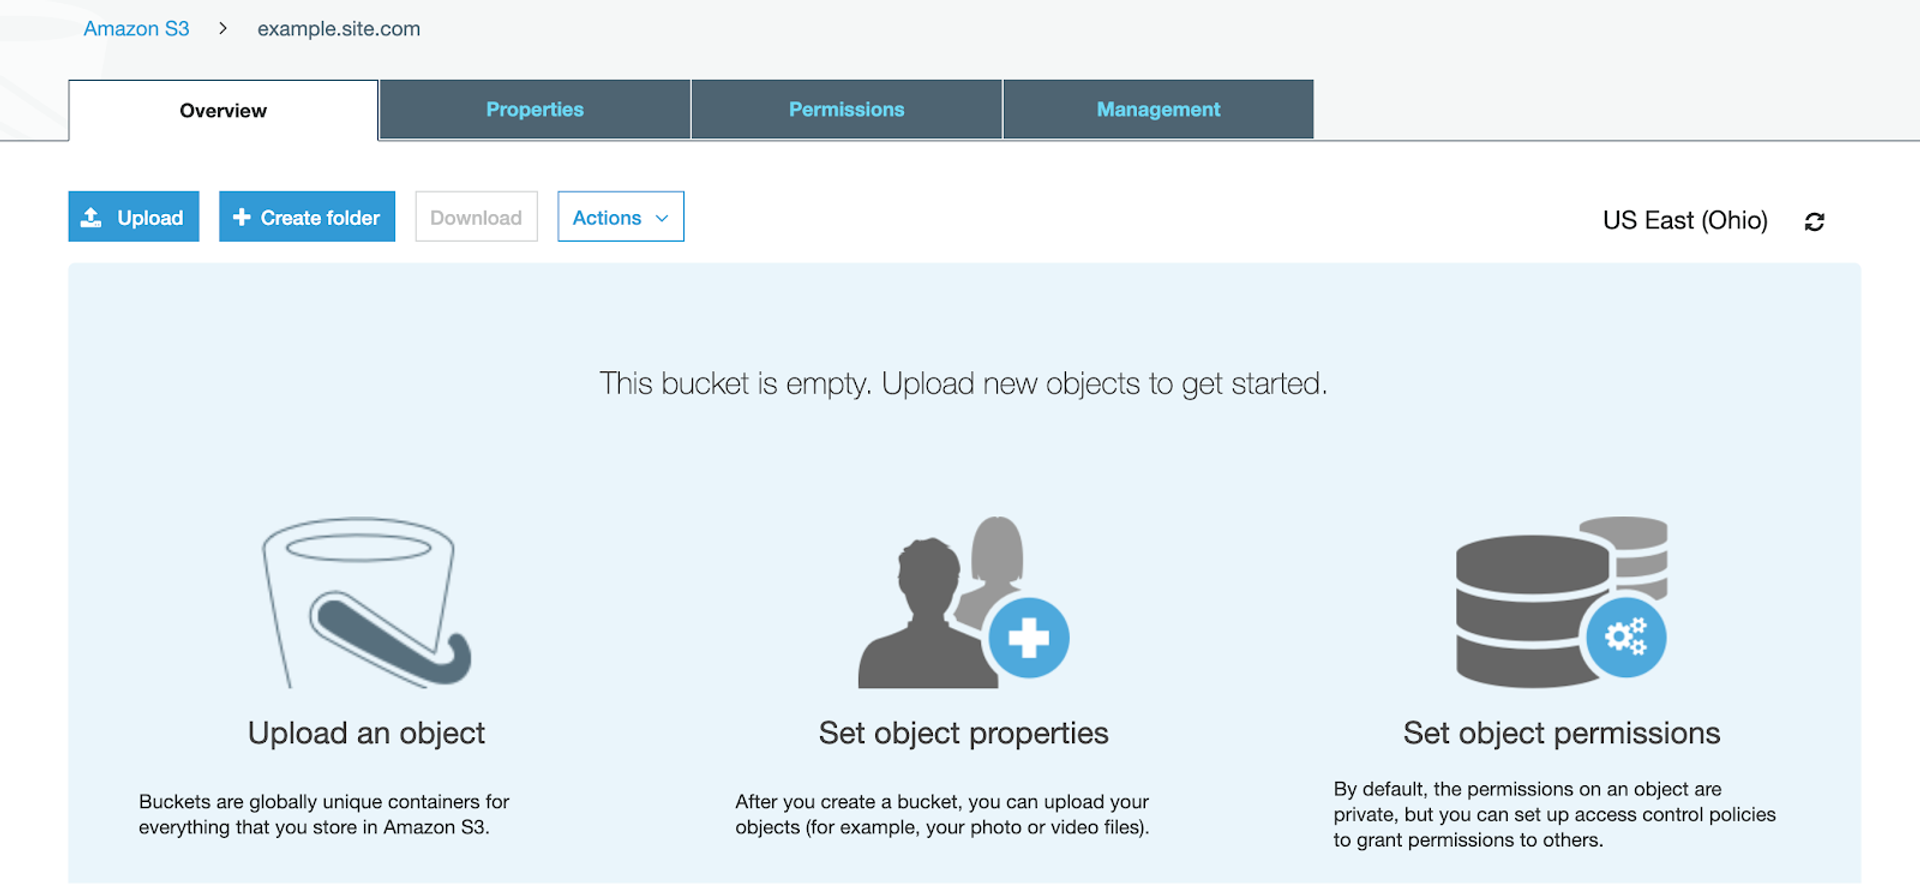
The first step in making your static site is to migrate your static files into S3 using the same structure you'd have them in on your local machine. You can create folders in s3 and upload them in the desired positions. Once the files have been uploaded they will each be accessible through their own URL's. This makes the security aspect a little tricky but I will show you how to lock them down so that you can only see your content through your own domain.
Getting a Domain with AWS
AWS allows your to purchase your desired domain from anywhere, but it also provides it's own domain registering service which is already integrated with all its other services. You can request a domain from Amazon Certificate Manager, and then, just by clicking a button, create a record for it in Route 53, which will connect all the necessary nameservers and create the desired CNames. One thing I like to make a point of when I'm registering domains with ACM is to add in the "splat" subdomain alongside my request for the domain itself. This is no extra charge and makes it easier to add in extra pages when both the domain and all possible subdomains are under one certificate, however depending on the application you may not want to do this for security reasons.
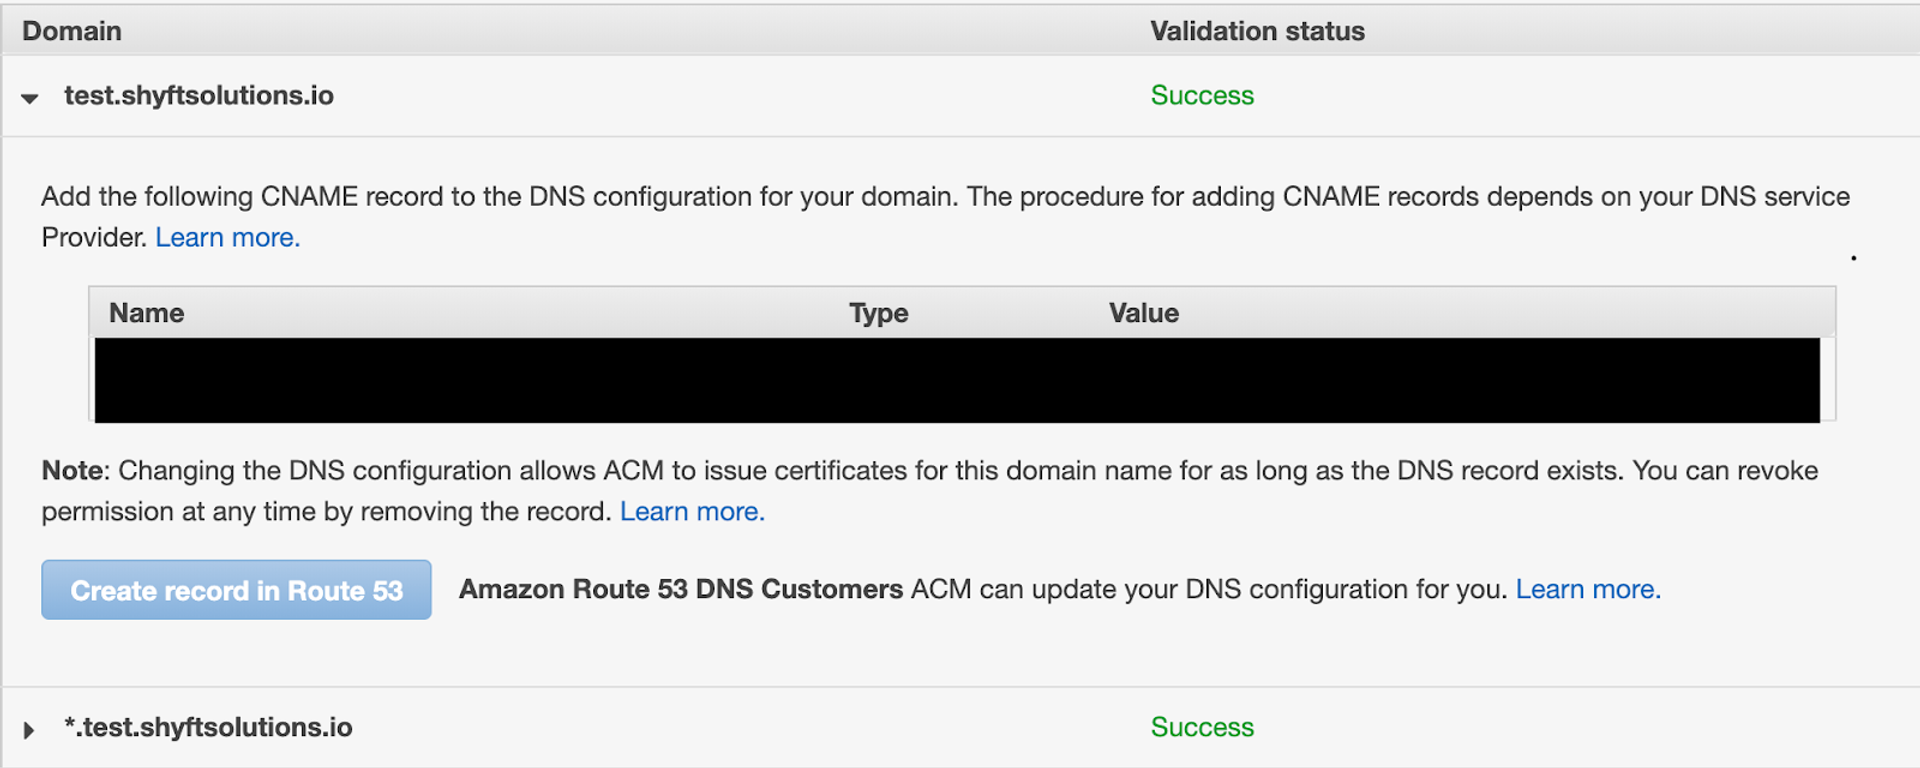
Here's an example of what it looks like after your domain has been successfully registered with the splat subdomain alongside it.
Cloudfront
CloudFront is where the our serverless calls will be made, since S3 is just a hosting static files. This is Amazon's own Content Delivery Network (CDN). It's where content is cached and then retrieved when a user accesses our webpage. The Cloudfront distribution is one of the most important parts of our layout. It connects everything and basically directs traffic to and from our site. Since all of our content is being stored on the S3 bucket, you'll want to make the bucket the origin for the distribution.
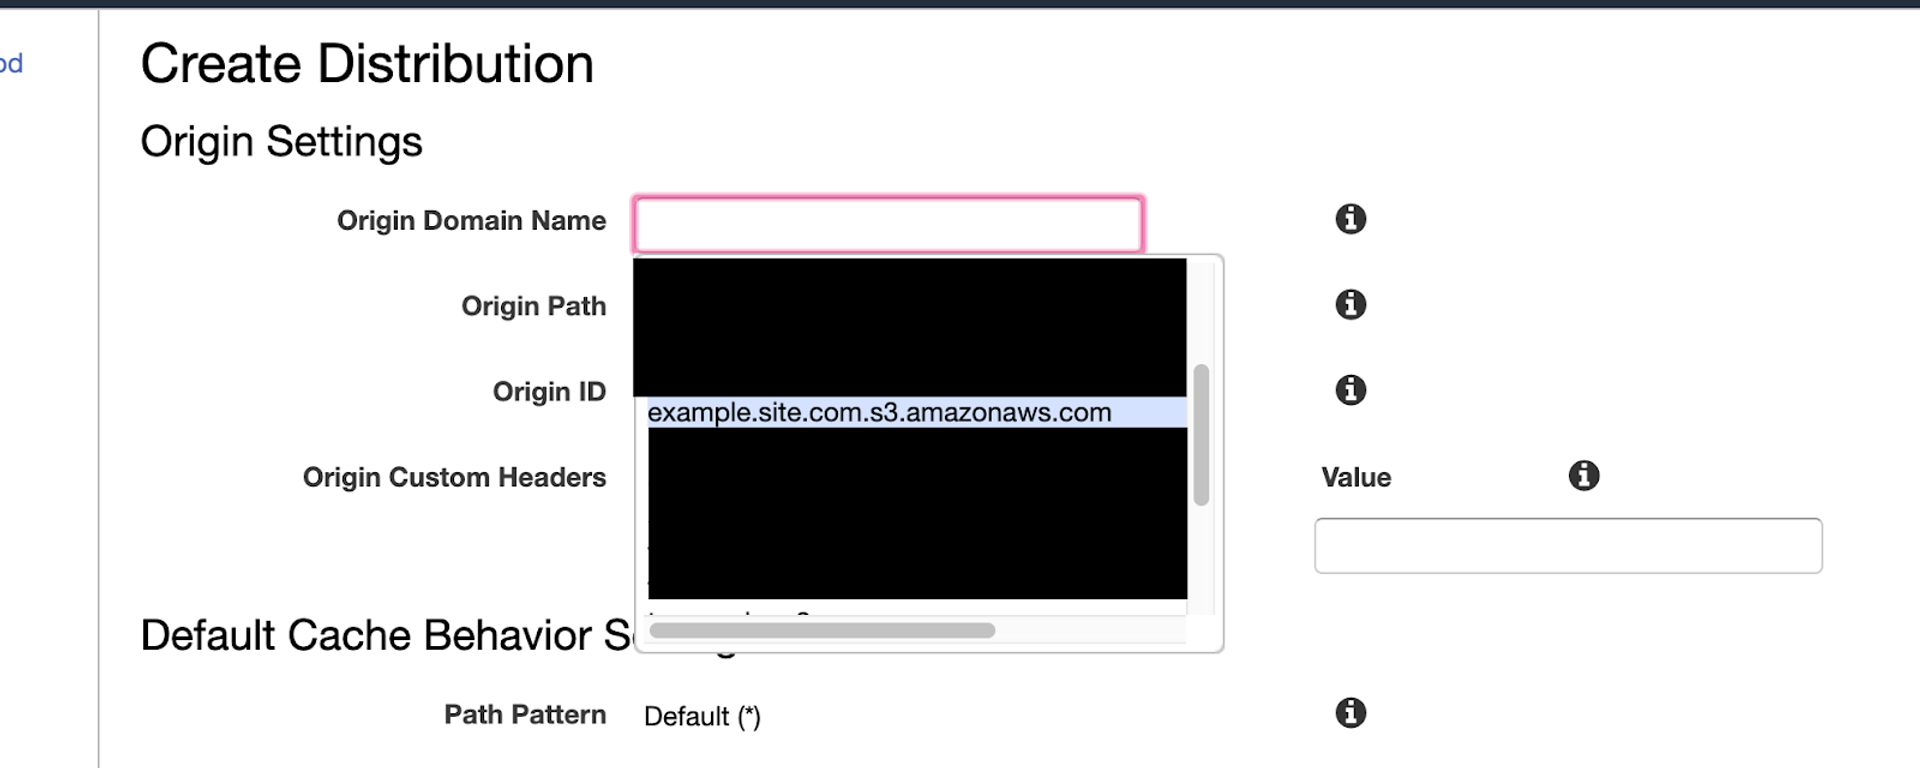
CloudFront distributions also generate their own URLS, but they're typically very long and complicated, so to make it easier you can assign your ACM registered domain to your distribution so viewers can access it through there. However, adding that domain to your distribution doesn't nullify the all the URLs for the content in your S3 bucket, so to ensure that your content can only be viewed through CloudFront, be sure to add an Origin Access Identity through you distribution and click the "Yes, Update Bucket Policy" button. This sets the S3 bucket policy to only allow the Origin Access Identity to view the S3 bucket contents. When viewers try to access your site through Cloudfront, they will be recognized as the access identity and will be granted access, but if they try to access any other way, they will not be recognized and will be told they are not authorized.
Cognito
Cognito is the service we will use to organize and register our users. AWS Cognito is split up into two separate products: Cognito User Pools and Cognito Federated Identities. For our purposes, we will be focusing on Cognito User Pools. The first thing you'll do is create a user pool for all your users to be stored in! Through creating the user pool you can add various settings like allowing users to register themselves, allowing social media sign in, and adjusting the password requirements. The one thing that you have to be sure to make though is the "App Client", this is what connects Cognito to your app for authentication purposes. This is what an App Client looks like in Cognito before it is made:
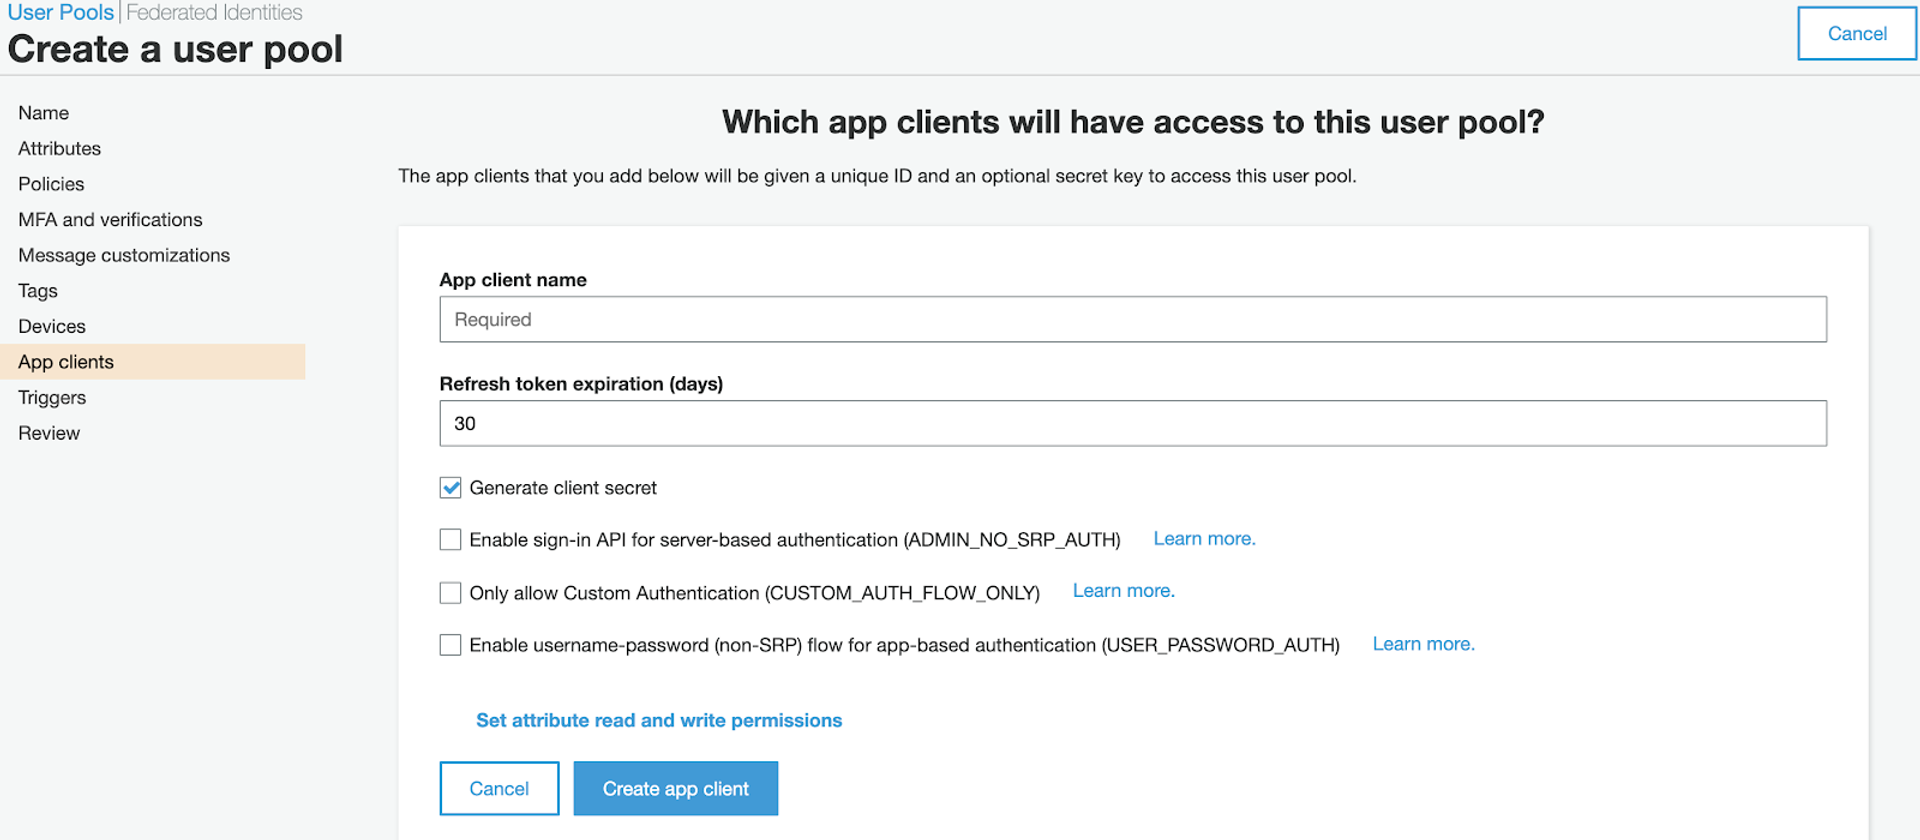
There are two thing that I really like about AWS Cognito: One is that nearly all user management can be done in-console. The UI is super simple and intuitive, so it's really easy for you to apply whatever settings you'd like to your own user pool!
Two is that it also has its own Hosted UI that handles the sign-in/up/and out processes of your site. The idea behind it is that you would create a subdomain connected to your main domain to host your authentication on. (This is what the "splat" domain was for.) Once you connect that domain to your actual domain, an authentication-handling UI will be generated.
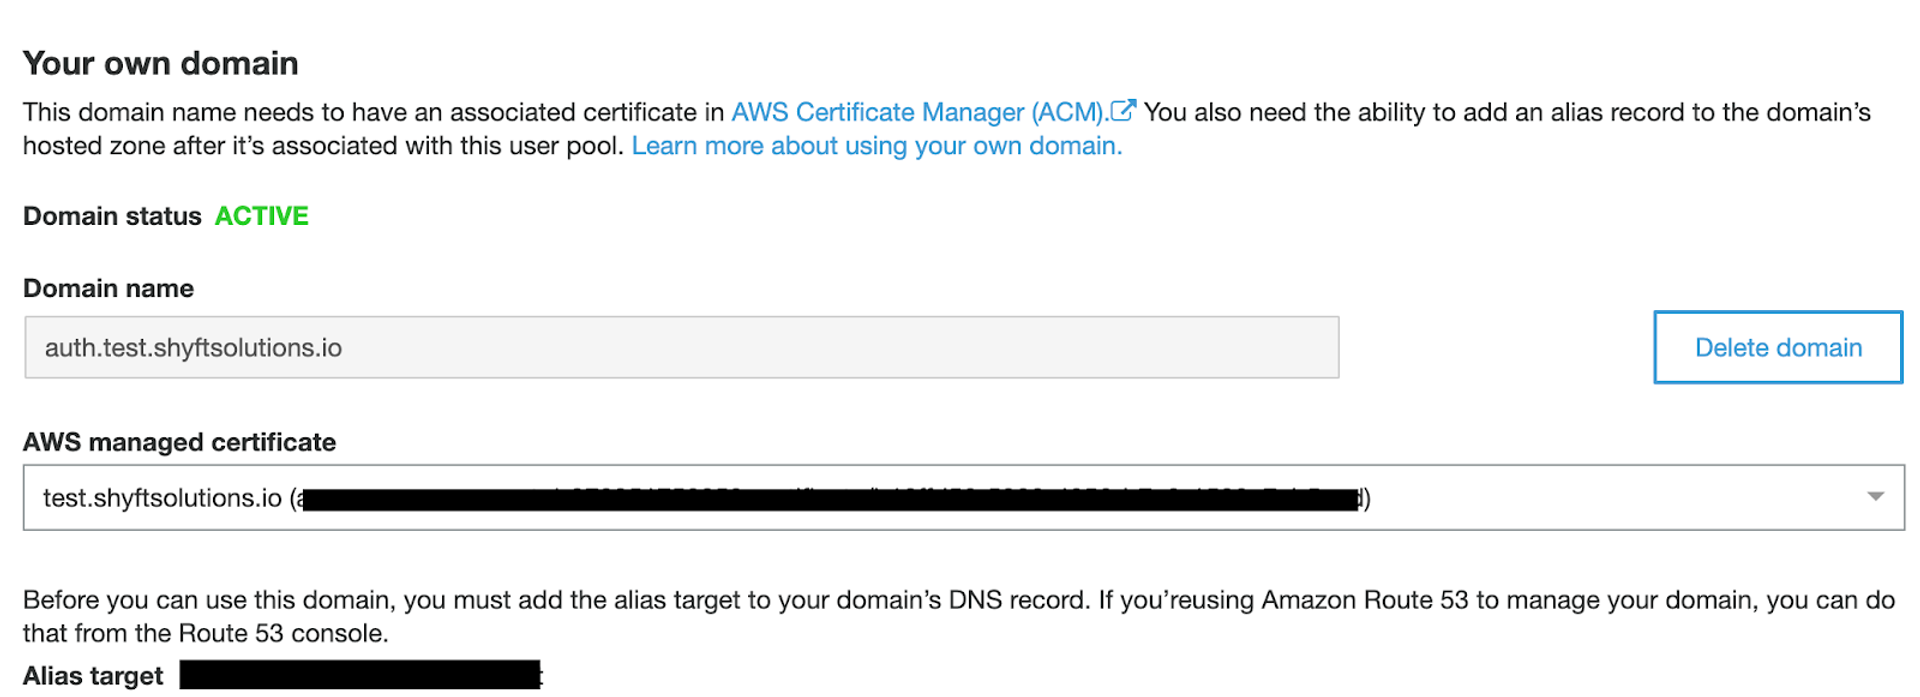
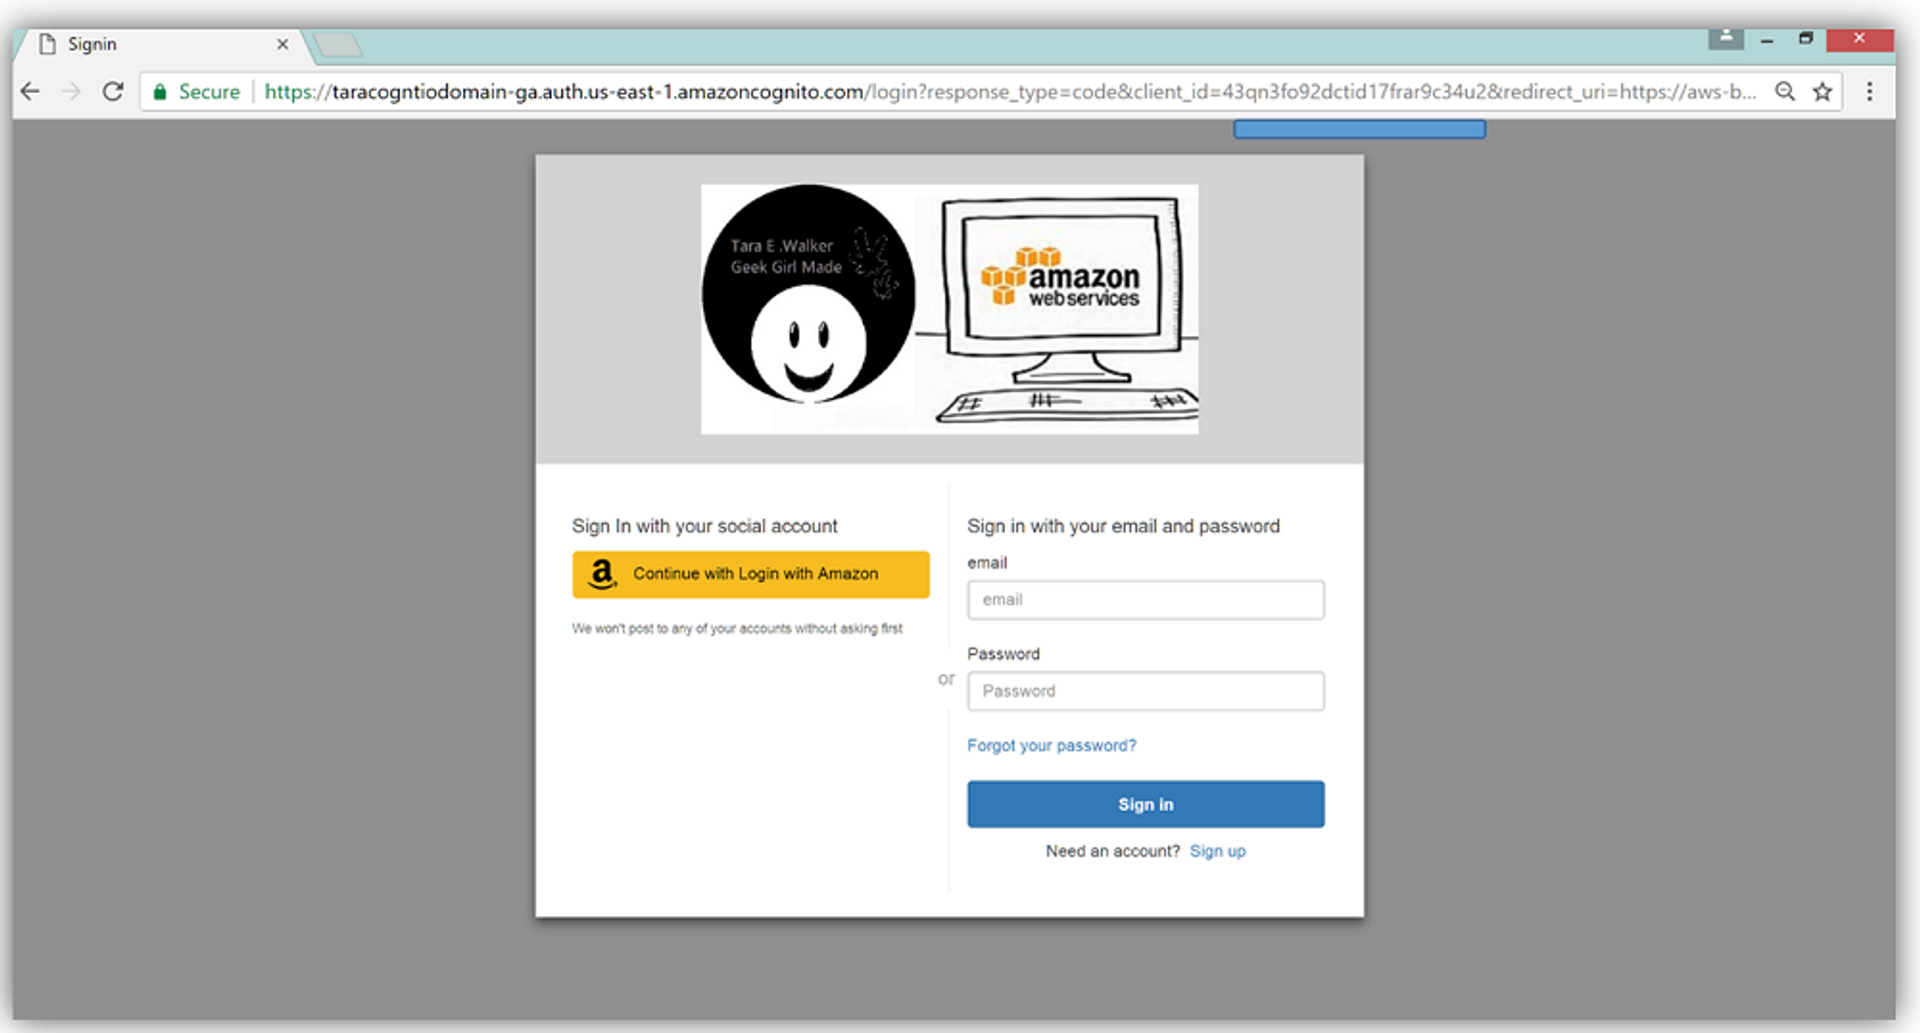
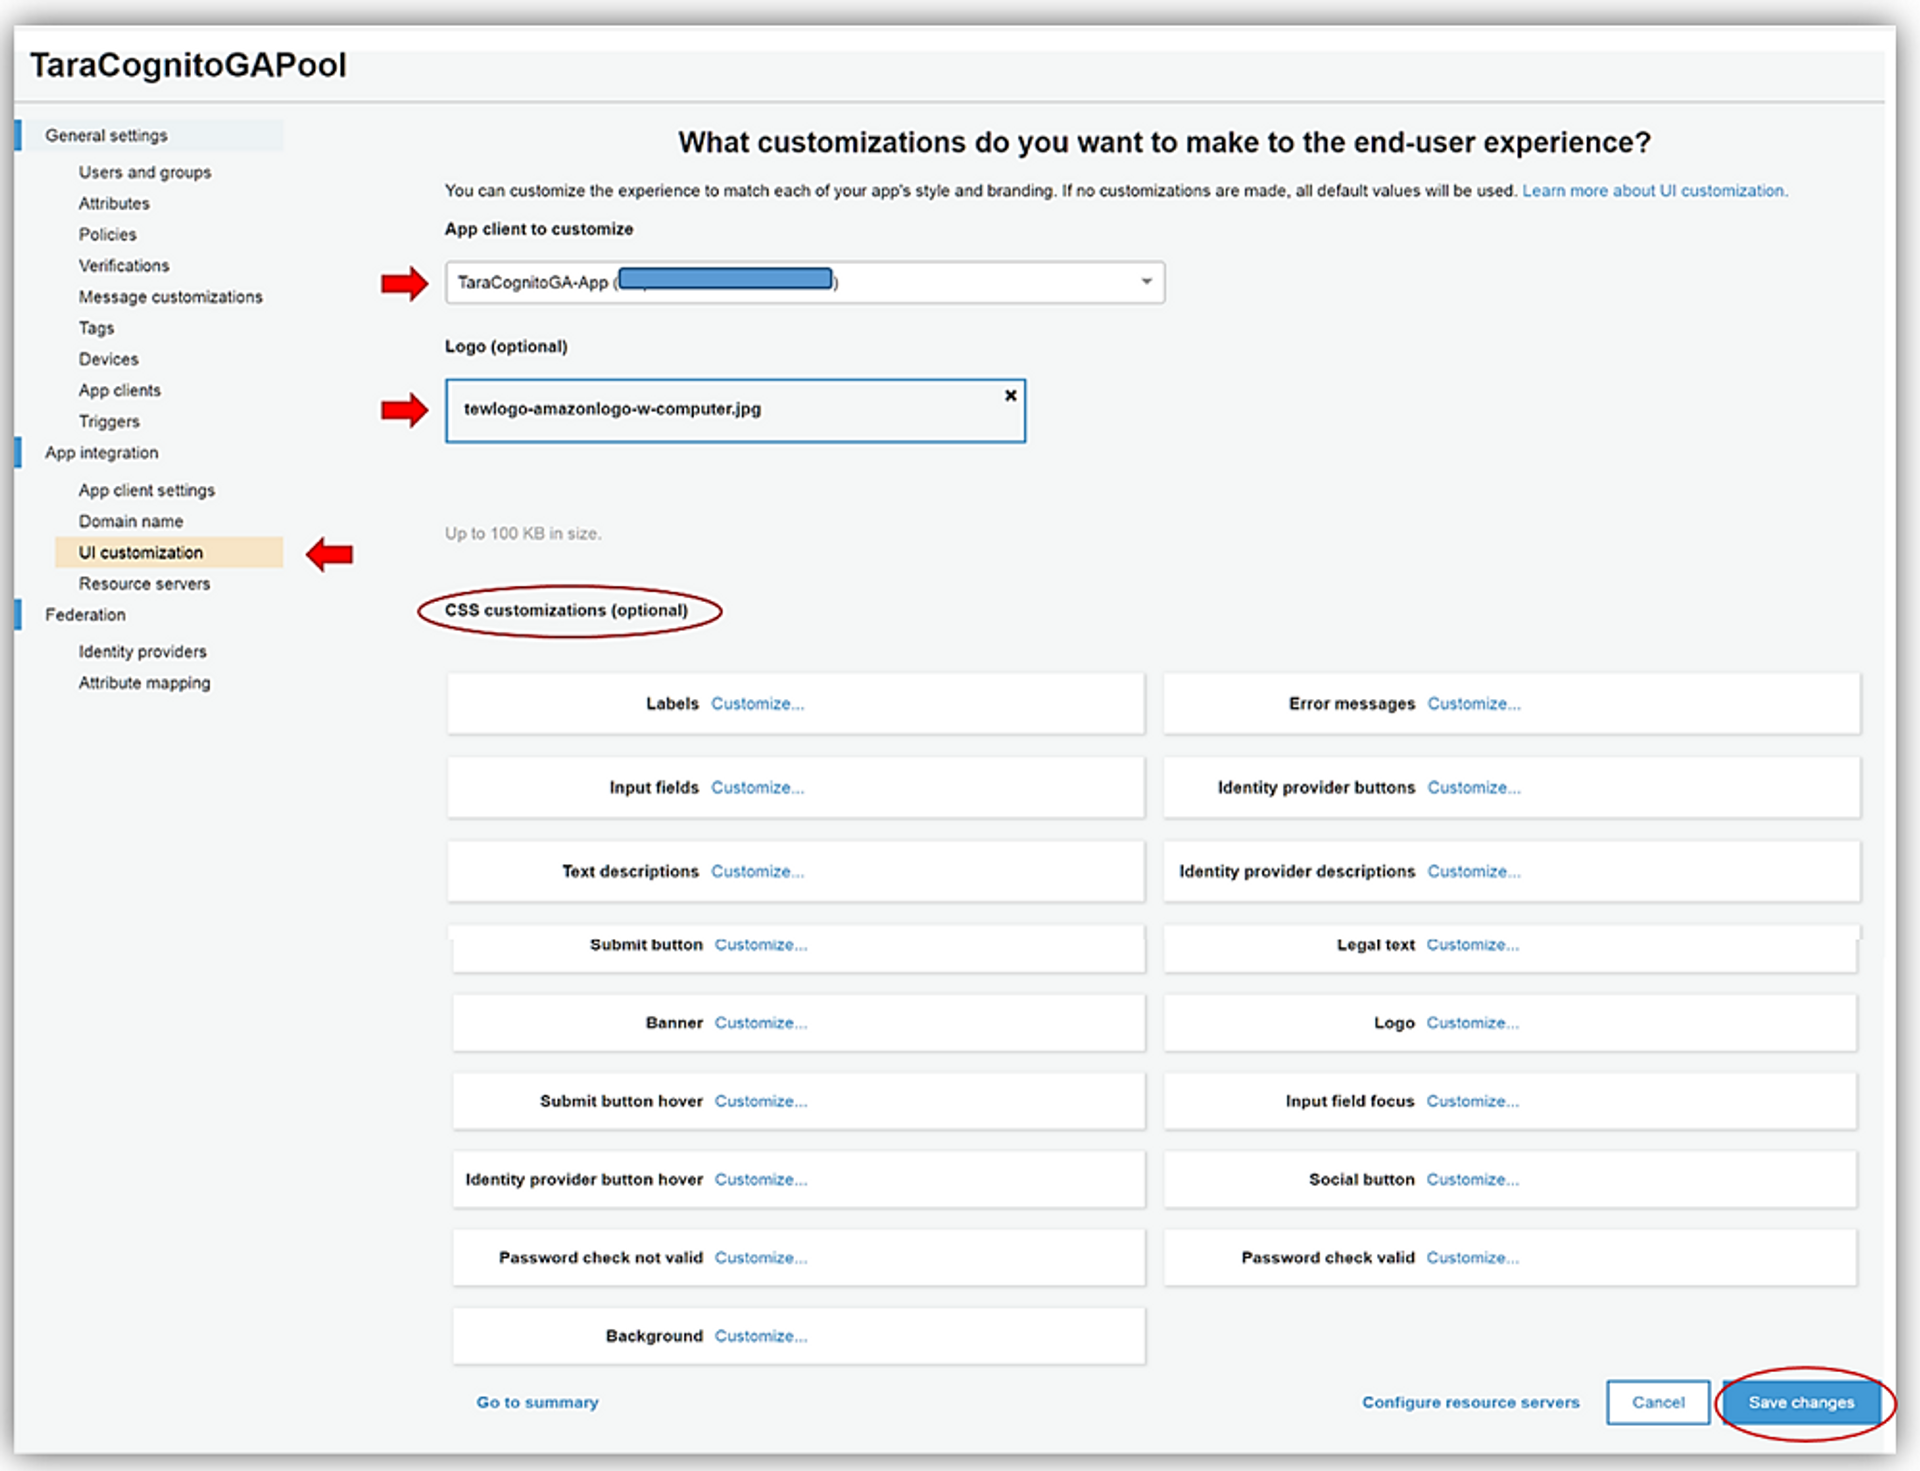
This takes some of the time and effort out of designing and coding individual sign in/up/out screens for your users, while also giving you the freedom to customize the way users authenticate using the built in CSS options the UI comes with. Here is an example of what the Hosted UI looks like prior to any styling:
And then here is the form in Cognito that allows you to apply different CSS rules to your pages (example taken from AWS documentation)!
Lambda
Finally, AWS Lambda is the product we will be using to fill in the gaps of our backend. Primarily, we will be using Lambda to authenticate Cognito users to our site! Lambda is a compute service from AWS which allows you to run backend code without the need for provisioning servers. At this point our site is mostly secure, but there are little ways that users can get around our authentication, like going to the urls of specific pages rather than just the main domain. So in order to ensure these users are always signed in and that they are working with current credentials, we can attach a lambda function to the default Cloudfront behavior to double check and make sure the Cognito JWT tokens are up to date and that users are going through the proper channels. Lambda code can be written in Javascript, Go, Python, and Ruby, but Javascript seems to be the preferred lambda language among AWS developers. You can write the code directly in the lambda console or you can write it in your dev environment and upload it as a browserfied zip file!
Hold on, Tokens?
Yes, Cognito authorizes users by checking the legitimacy of JWT tokens (or JSON Web Tokens) that are passed to the app client when navigating to the site. These tokens are found in the headers of the browser and can be accessed, decoded, and double checked for age and legitimacy. This process can be a little tricky for those not experienced with working with headers and cookies, but AWS has a good amount of documentation on the topic, and there are a handful of github repos to work from demonstrating how to analyze these tokens. Unfortunatley I cannot go line by line through our own code with you, but I recommend you take a look at this github repo for a demo on how it works!
You Did It!
Now, after following all those steps you should have a reliable, proof of concept site to work from, now you can customize it to your own personal or business needs. Some other fun things you can do with AWS is add logging to your events, create groups for your users with different permissions attached to them, or create triggers which will perform custom events for your users on sign in/sign up! One of the things that makes AWS so popular is its ability to be taken apart and put back together, there are TONS of ways to host your own site and to get your presence out there. So experiment! And if you come up with something really good, come back and let us know.
Here are some resources that you might find useful:
Wild Rydes (AWS's go-to serverless demo, great for beginners)
Further reading on JWT tokens in Cognito User Pools